
Urbana School District 116 students use QuickCard badges attached to their chairs for a seamless Little Sponges login.
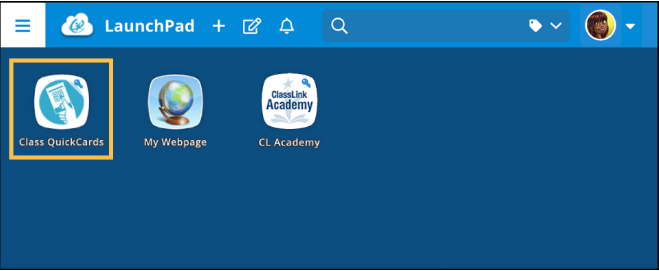
Click the Class QuickCards app from your LaunchPad.
✔️ If you don’t see the QuickCard app, ask your school’s ClassLink Administrator to assign the app to you.
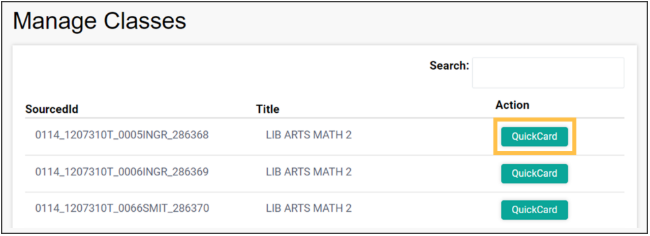
When you open the app, you’ll see information on the classes you’re teaching. Click the QuickCard button in the Action column for the class QuickCards you want to manage.
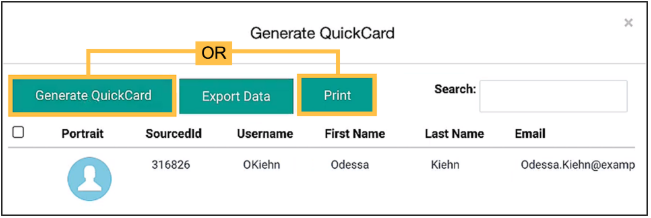
You’ll see information on the enrolled students for your selected class. Click Generate QuickCard to create QuickCards for all students in the class, or click Print to print out all the QuickCards for the selected class.
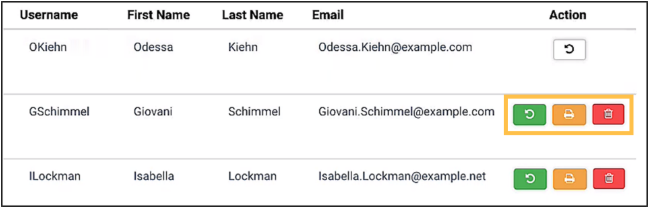
In addition to generating and printing QuickCards for all users, you can do the same for individual students.
✔️ If you can’t find one of your classes, or one of your students is not in a class, contact your technology department. It’s likely there are issues with your Roster Server data.
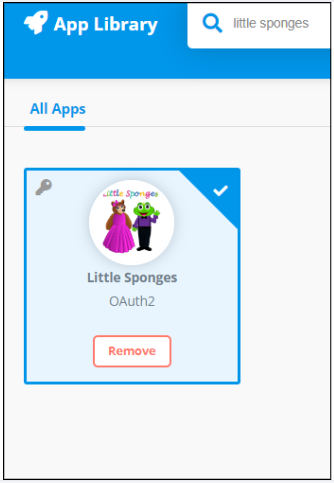
Adding Our App to ClassLink: Please search for Little Sponges in the app library.
To ensure smooth integration and efficient data sharing on Clever/ClassLink, please follow these procedures:
1.Share Appropriate Sections: Only share homeroom sections or those requested by teachers/admins. Please do not share multiple sections for the same student. Various sections will prevent students from accessing the program.
2.Notify Changes in Section IDs: If you change the sis_ids of your sections during the school year, please notify us immediately. The sis_id is a key identifier for ensuring student access, and changes without our knowledge may disrupt platform access.
3.Admin Access Requests: Inform us if any school or district admins need access to Little Sponges.
By following these steps, we can maintain effective integration and minimize disruptions for students and educators.
To learn more about generating and managing ClassLink QuickCards, check out this helpful guide: https://help.classlink.com/s/article/Class-QuickCard-for-Teachers
© 2026 Little Sponges. All rights reserved.